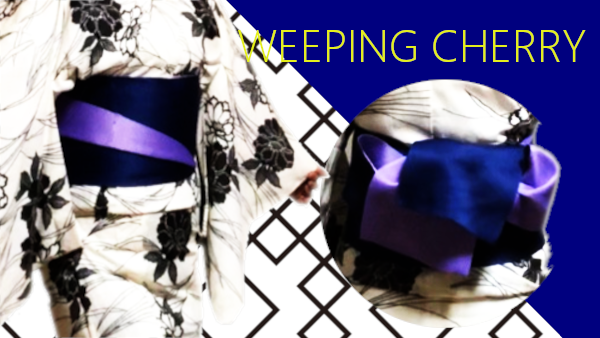
How to tie weeping cherry
Hanhaba-obi, or a half-width obi is easy to handle.
There are so many ways to tie.
I’m going to show you how to tie weeping cherry. It’s the easiest way of tying obi for yukata. It’s also good for kimono.
This time we use a 3.5m half-width obi.
I’m right handed. If you are left handed, all directions of obi are opposite.
Let’s begin!
Take the length of te
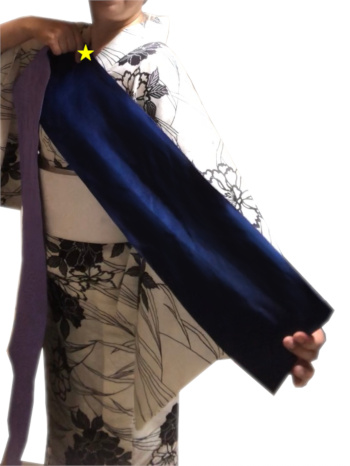
1. Take the length from the hand to the front center, which becomes te. When you use a longer obi, take it more.
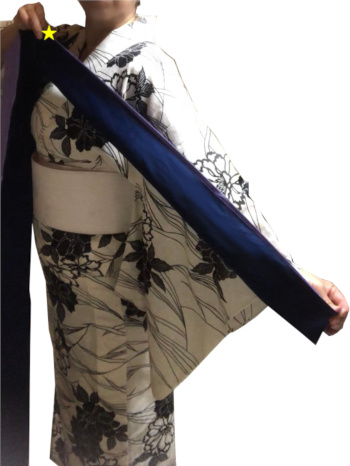
2. Pull the te once to make it straight and fold it into half.

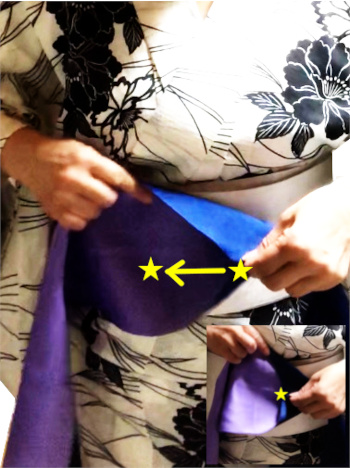
3. From the yellow star, make a triangle on the front of obiita, a board for obi. Have a look at the small image in this photo.
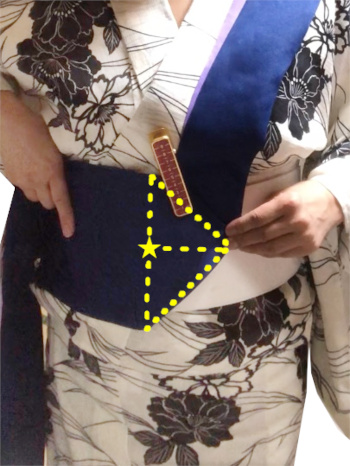
4. Turn over the triangle. Put the te on the shoulder, and pinch the folded part and board together with a clip.
Wrap obi
5. Wrap obi once. Hold it at the front and tighten it.
6. Wrap obi again and tighten it.
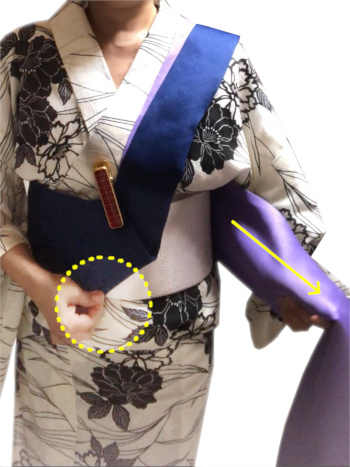
7-1. Fold obi diagonally from one side of the back to show the other color.
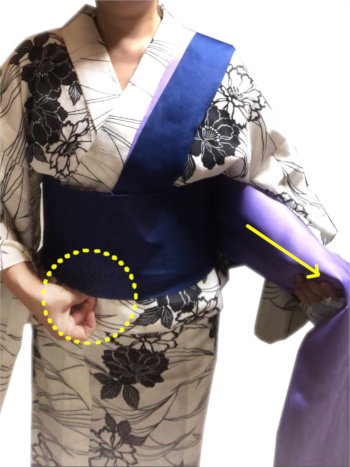
7-2. The view of the back after folding it gradually.

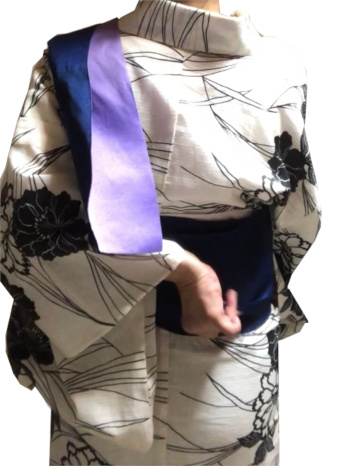
8. The fold of 7-1,2 becomes half on the opposite side.
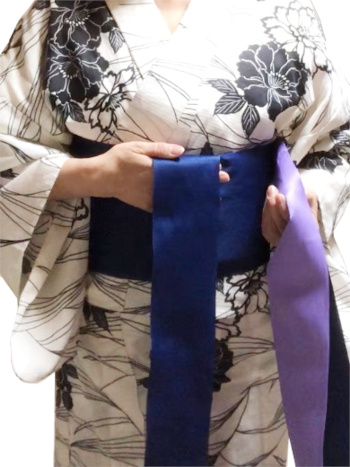
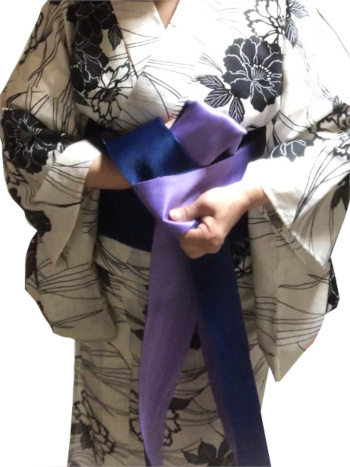
9. Take the te off from the shoulder while pulling the other side forward. The other side is called tare.
10. Slide the te aside.
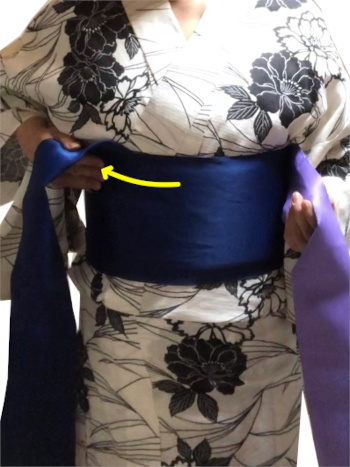
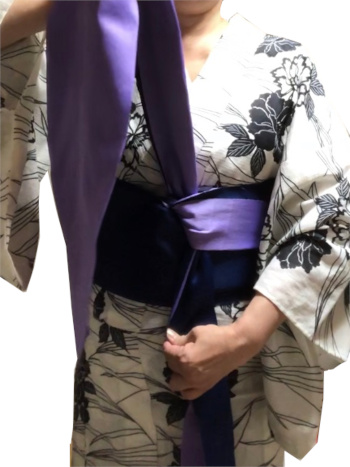
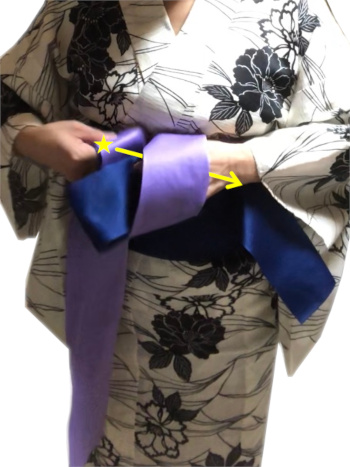
11. Cross the te and tare with the longer one up. Hold the intersection firmly while pulling it forward. In this way of tying, the long one always comes the top.
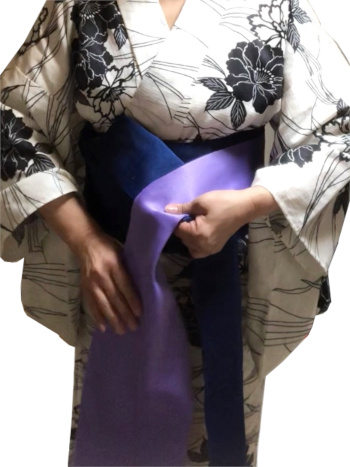
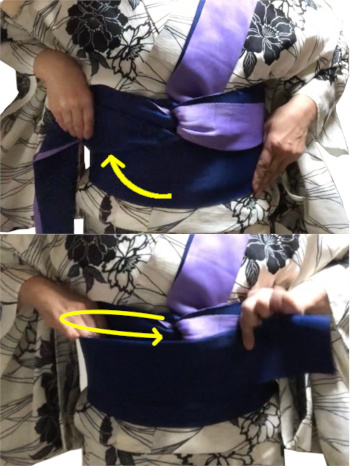
12. Make a knot.

13. Tighten the knot on the upper line of obi.
14. Rotate the knot 45 degrees not to get loose.

15. Put the upper one tare on the shoulder, and open the base of the knot not to get loose.
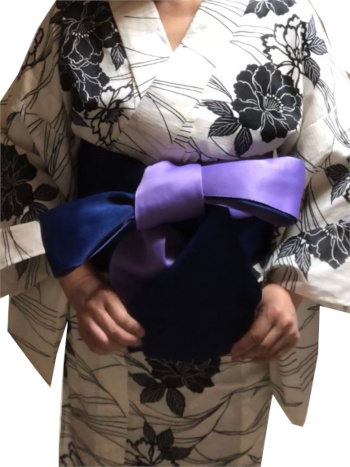
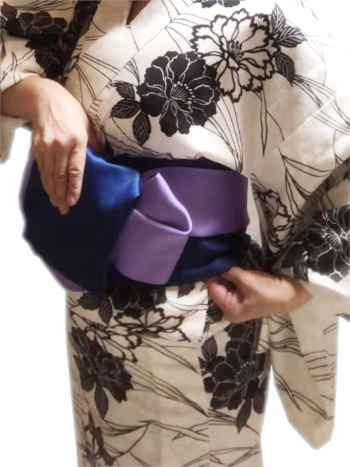
Make a bow tie
16. Pull the blue one te against the knot and fold it into a half body size.
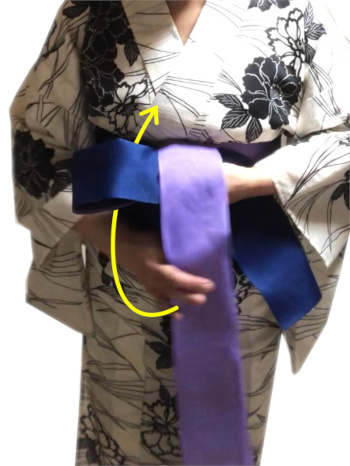
17. Make a bow tie.
18. Go on.

19. Pull the bow’s wings out.
20. Hold the both ends together.
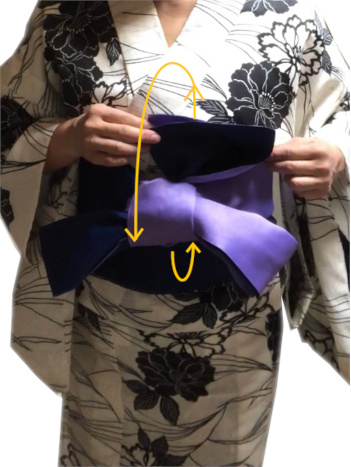
21. Let the ends go through the back of the knot and cover the knot with them.

22. Open the wings and make the shape beautiful.
23. Are you ready to turn obi?
Turn obi and finish
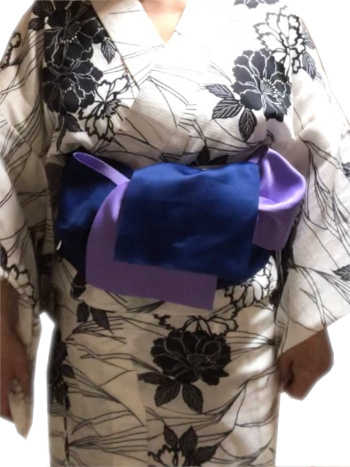
24. Hold the knot and the bottom of the obiita board. Put your belly inside.
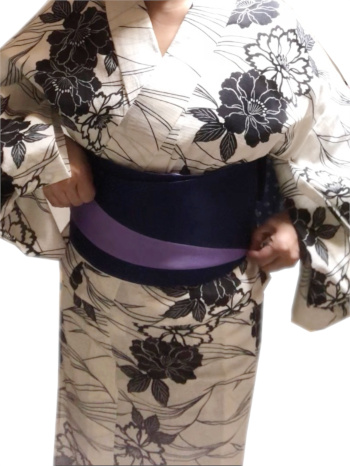
25. Turn obi clockwise 180 degrees and make the front fold beautiful.
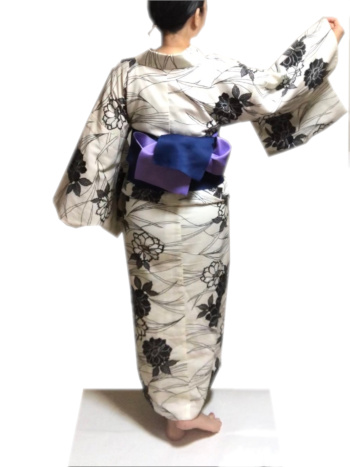
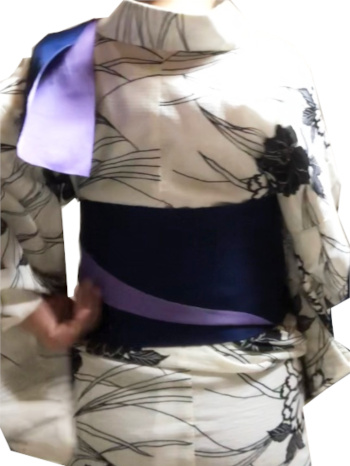
26. Finally finished!

27. Look great! Let’s go out!
Good job, ladies! If you want to review, go back to the part 1 or 2.
Do you want to decorate your obi more?
Here is a video. Check it out!