Underwear for kimono
Did you prepare everything for yukata?
Or
Did you wear tabi?
Underwear is the foundation for wearing kimono, so it is very important to choose and wear it properly. That way, you can look beautiful and feel comfortable.
There are a few things to keep in mind when choosing and wearing them.
Select the best underwear for you
There are many types of traditional underwear. They are really good for kimono. However, our lifestyle has changed. You don’t have to wear traditional underwear. Feeling comfortable comes first. I usually wear functional underwear, such as “air something” because they are convenient for me.
If you have sensitive skin, please use ones made of natural materials. Please select the best undergarments for you.
The following is the list of underwear for kimono.

Please be sure to choose a wide-necked upper underwear.
If the underwear is seen from the neck, your charms will be reduced. The beautiful neckline is one of the attractive points of kimono.
What is wasou bra?
Wasou bra is a functional brassiere to make the breasts flat. It helps you put on kimono easily and neatly.
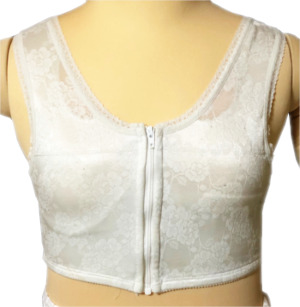
Do you know the reason why I say “Use a bra with no padding”?
Kimono is like a piece of cloth. Since you wear it so that it wraps around your body, a flat body line is better than a curved body line.
I recommend you use wasou bra or a bra with no padding.
How to put on kimono slip
It is very easy to put on!
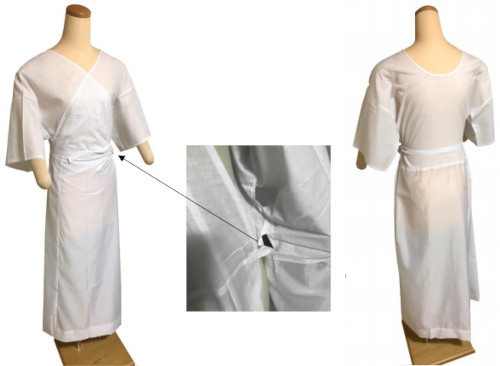
When you visit Japan and go to kimono shops for rent, please remember how to put on kimono slip. It is just like a wrap dress with attached strings.
Let’s begin!.
Sorry for strange photos!
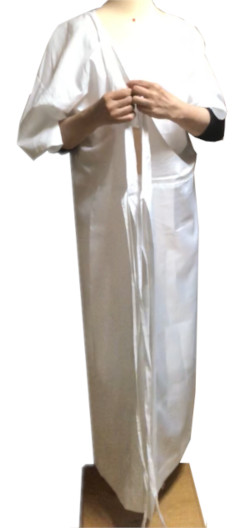
1. Put a slip on and hold the thin collar equally to wear the slip symmetrically.
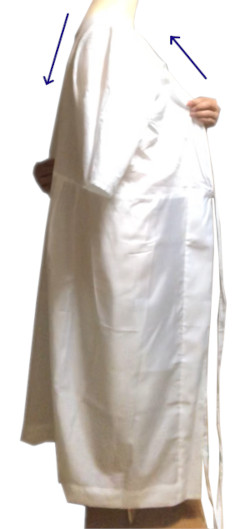
2. Holding the thin collar, pull down the center back to make space at the nape.
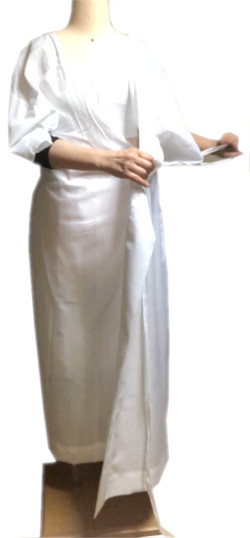
3. Let the right side string go through the hole in the left side seam and cover your body with the right side of the slip.
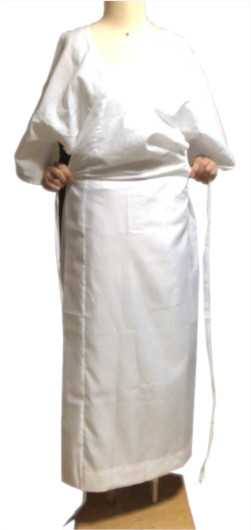
4. Cover your body with the left side and bring both strings to the back.

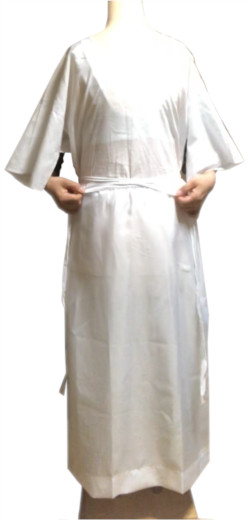
5. Make an X at the back.
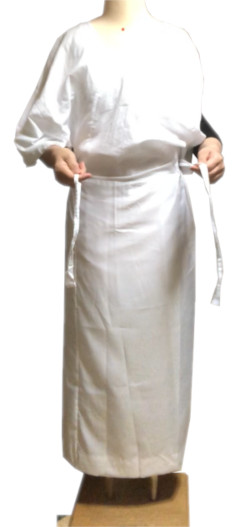
6. Bring the ends to the front.
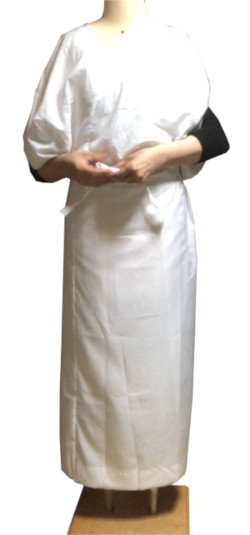
7. Tie a half bow knot.
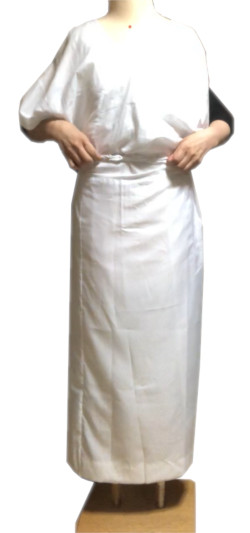
8. Tuck the ends in and finished!
Are both sides of the collar symmetrical?
Wearing symmetrically is very important for the next step to put on kimono beautifully.
Now, you are ready for wearing yukata and kimono.
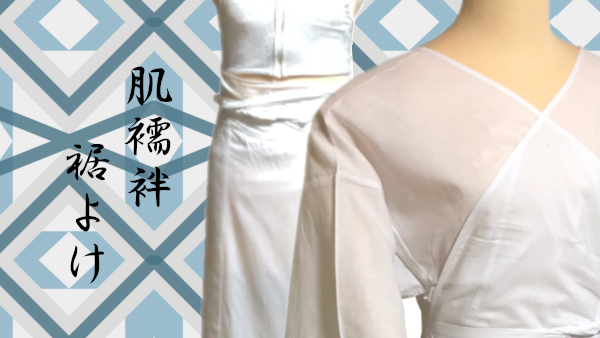
How to put on susoyoke
Susoyoke is just like a wrap petticoat to correct your figure and protect the lower body.
I think the best material for susoyoke is bemberg. It does not generate static electricity in winter.
These images are slightly strange, but no problem!
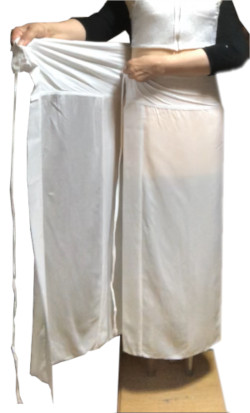
1. The length of susoyoke should be shorter than that of nagajuban. Wrap the cotton part around the lower belly, cover the lower body with the left part to adjust the front width.
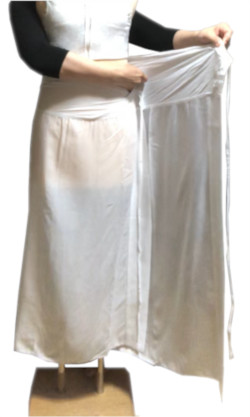
2. Open half. Cover the body with the right part.
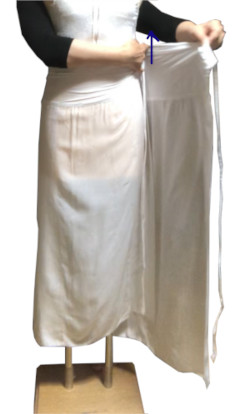
3. Twist your hand up a little to raise the corner of the hem.

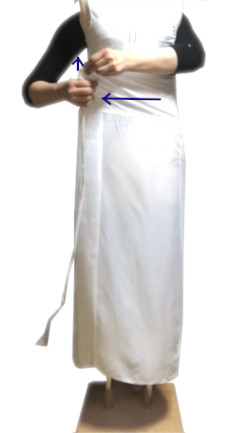
4. Cover the body with the left part and pull the seam of cotton part horizontally to tighten the lower belly. Then pull up the base of the string a little.
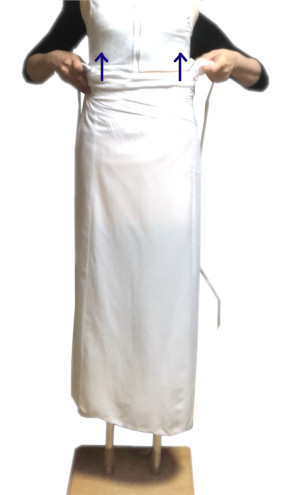
5. Pull up the base of both strings. Doing 4 and 5 will narrow the bottom of the hem. It looks like a long tight skirt.
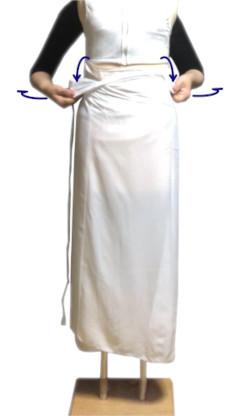
6. Fold the base of both strings down, bring the ends to the back, and cross them at the back.
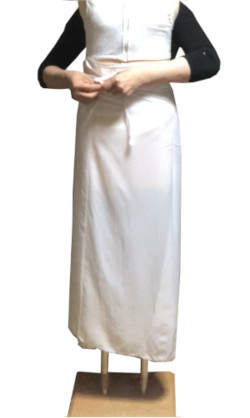
7. Bring the ends to the front and make a half bow knot. Do not tighten the strings too much.
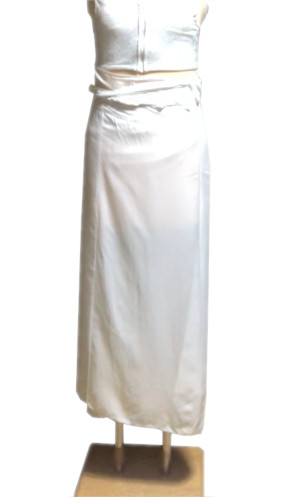
8. Tuck the ends in.
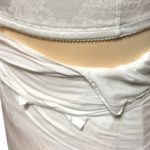
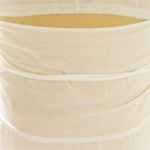
Views of susoyoke around the waist
Look at the photos above.

How to put on hadajuban
“Hadajuban doesn’t have any strings! What should I do?”
I often hear someone says so.
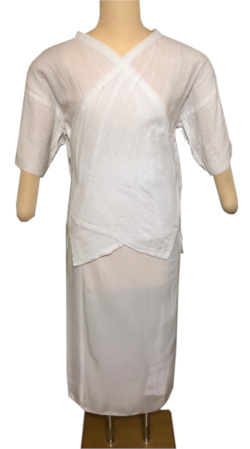
1. Put on hadajuban symmetrically. Cover the bust deeply and equally.
Did you? Okay, that’s the just size for you!
Cotton has frictional force because hadajuban is made of cotton. That’s why you don’t need any strings!
Also cotton absorbs perspiration well and makes you feel good.
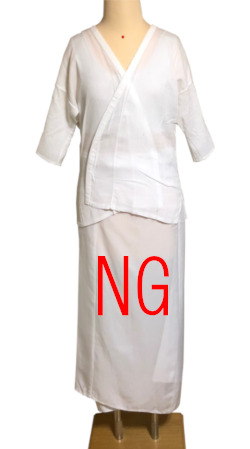
The photo below is not good. It is smaller than you.
This is the back figure.
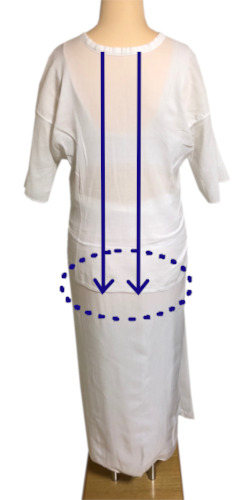
If you want to take a wide space at the nape, you hold the hem of hadajuban (dotted line) with both hands and pull it at the same time.
The next step is how to use padding.


