How to tie ichijudaiko
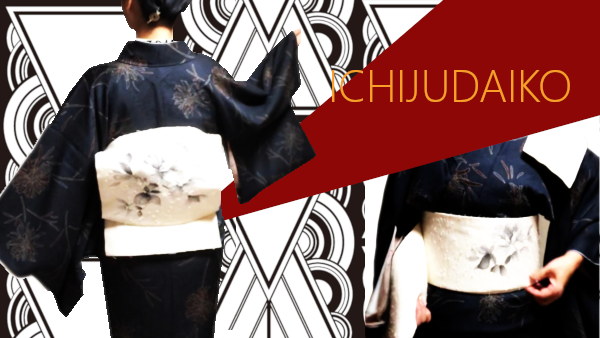
The next step is tying nagoya obi into ichijudaiko.
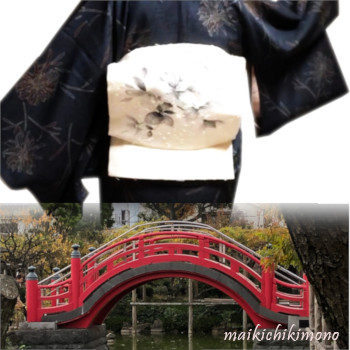
Ichuju literally means one layer and daiko means a drum. Daiko is usually pronounced taiko in one word. Ichijudaiko looks like a drum or drum-shaped bridge in a Japanese garden.
This is the most basic way of tying. If you master this, you can go anywhere.
So let’s get started!
Preparation
Things necessary
- Nagoya obi
- Obijime cord
- Obiage cloth
- 2 himo (karihimo)
- Obimakura pad wrapped with the gauze (30 cm × length of your opened arms)
- Clip and rubber band (if you need)
Please refer to Preparation for kimono lessons if you want to check the detail.
Tie obi
Wrap obi and tighten it
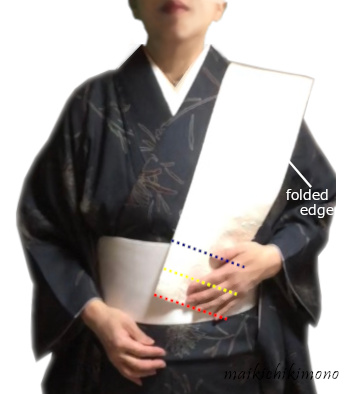
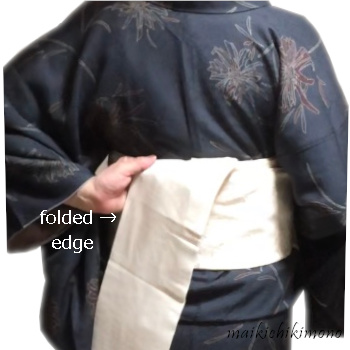
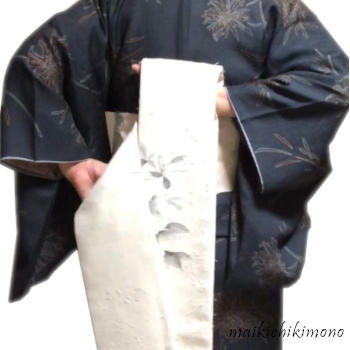
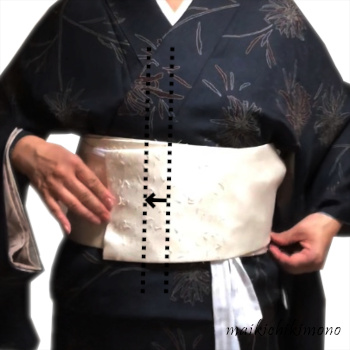
1. Take the half-width part called te and put it on your shoulder. The folded edge called wa is facing outward.
The position of a front pattern called dou-gara changes depending on the position of tesaki. (Blue : left, yellow : center, red : right.) If you use obi with whole patterns called zentsu-gara, basically put it on the blue line. There are no rules for the position of the front pattern.
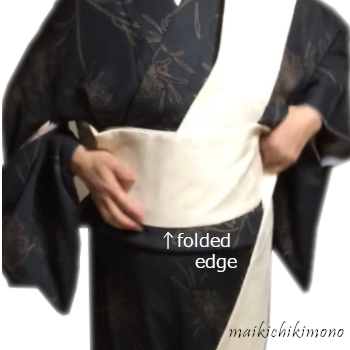
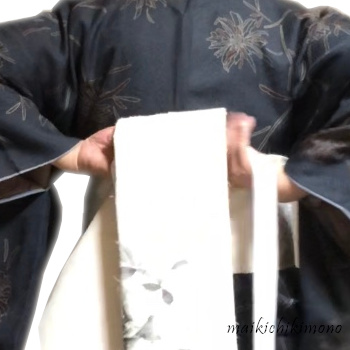
2. Wrap obi once. The folded edge called wa is always the bottom.

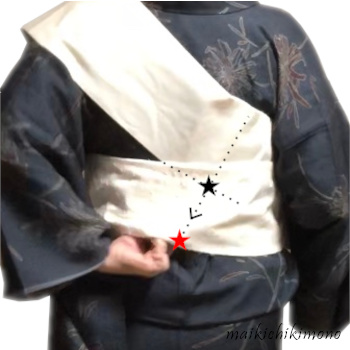
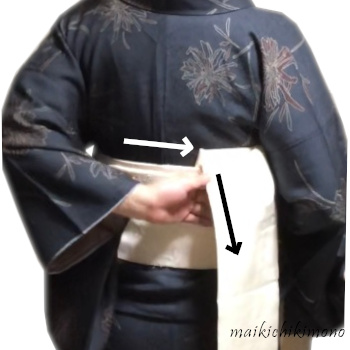
3. Take the diagonal part (black star) from the bottom.
4. Draw it (black star) to the bottom line called obishita-sen (red star) and pull the right hand obi forward.
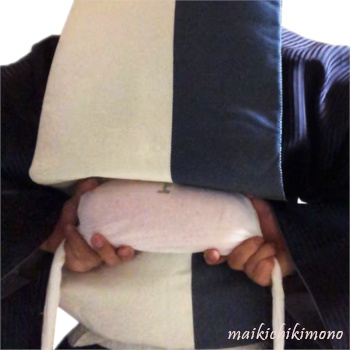
⇒ If you use a no-strap obiita, place it between the first and second turn as shown in the photo above.
5. Wrap obi again along the first turn.
Make a knot by folding
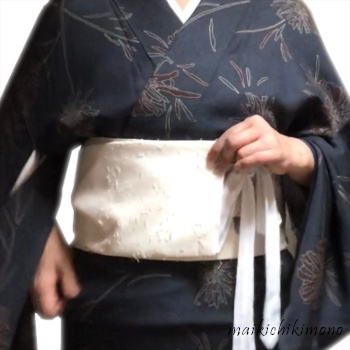
6. Take te off and hold the folded edge called wa.
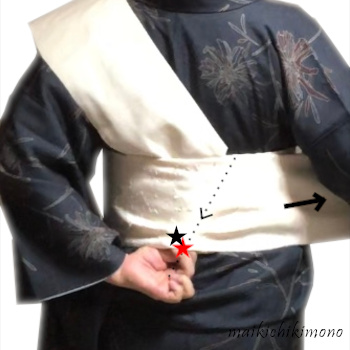
7. Slide it to the right beyond the back center and slide the left hand down to the bottom line.
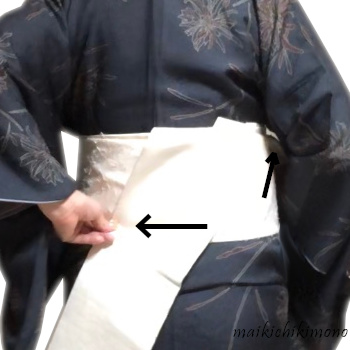
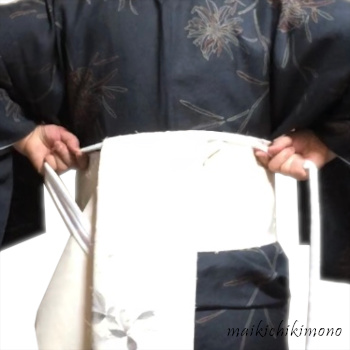
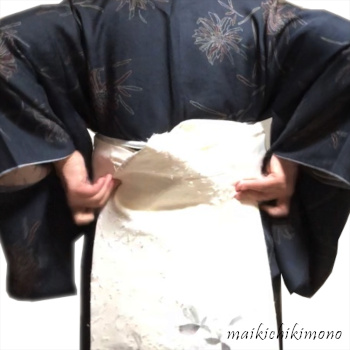
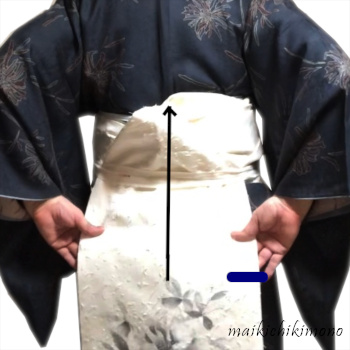
9. Slide te a little to the left. While hold the left hand there, tighten the right hand obi.
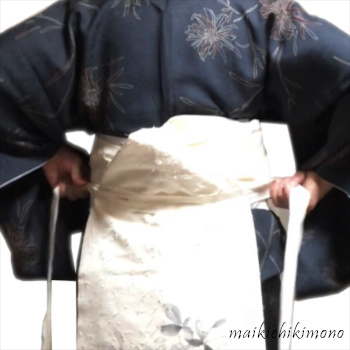
10. Te and tare were crossed. Place your right hand under the cross part while holding your left hand in place. Then fold it up as following the dotted line.
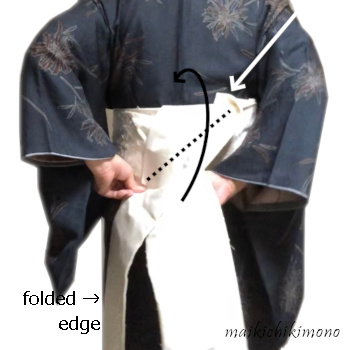
11. View after folding up. Folding te and tare together makes a knot. You may switch to your dominant hand.
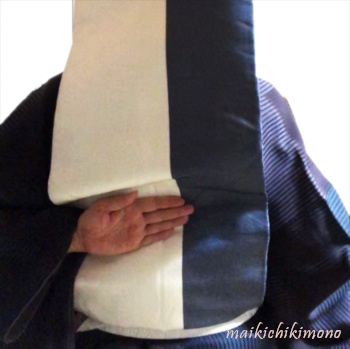
12. Take the center of karihimo and pass it to the other hand.
13. Secure the knot with karihimo.
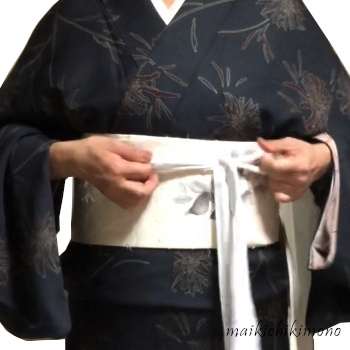
14. Bring the ends to the front, and temporarily tie them firmly on obi.
Tuck te at the front
15. Pull the te enough and bring it to the front. Is there te-saki at 3 cm from the front center? That is the ideal length for ichijudaiko.
16. If it is longer, turn it to the opposite side. If it is short. no problem. Continue as it is.

17. Pinch te at the front with a clip.
Make otaiko : upper line
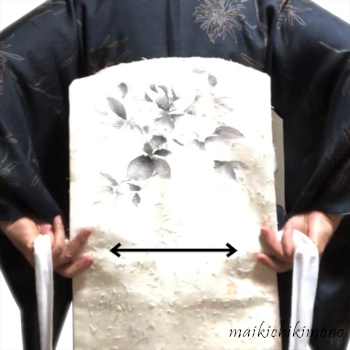
18. Open taremoto close to the knot and fold into a triangle.
19. Tie another karihimo around the waist to keep obi in place.
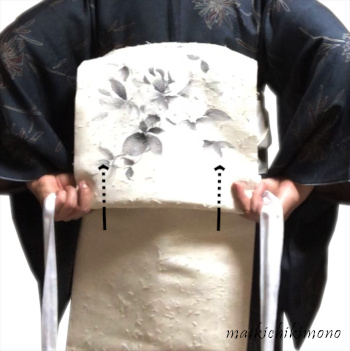
20. Fold up the obi from the 2nd karihimo. The blue clip is the mark of the upper line of otaiko.
21. Hold the upper line in place and take obimakura, a pad for obi.
Rest obimakura on the back

22. Put obimakura inside.
23. Place obimakura on the upper line called obiuwasen. Refer to the following a to c.
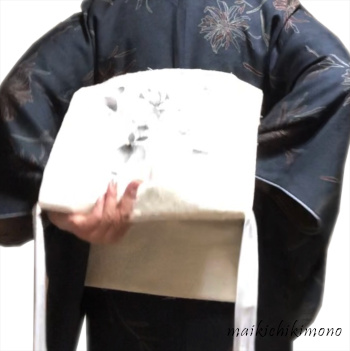
————————————————————
a. Place the hand as shown in the photo.
b. Hold the pad with both hands.
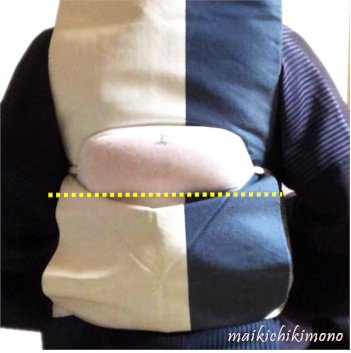
c. Put the pad on the upper line of obi (yellow doted line).
——————————————————————-

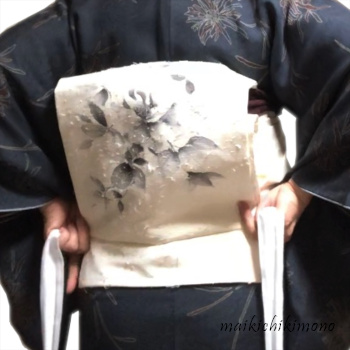
24. Hold the gauze string only. While pulling it forward, move it up and down to fit the pad firmly on your back.
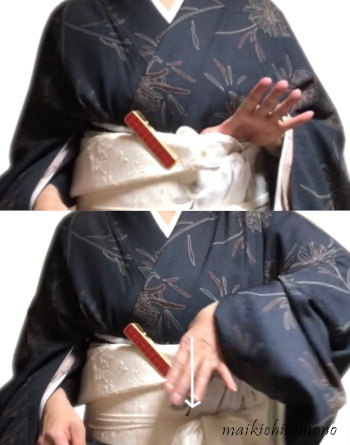
25. Tie the string aside and pull it forward at the center front. Put the knot deeply between obi and datejime.
Cover obimakura with obiage
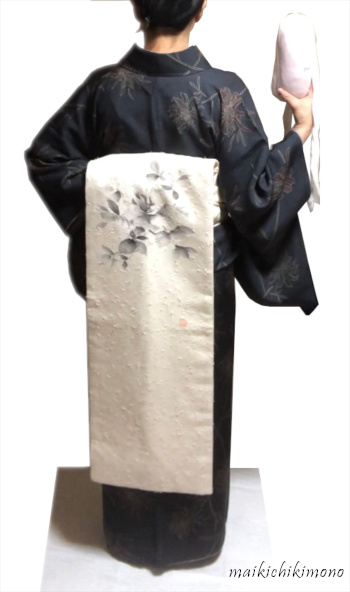
Tare is turned up to see well.

26. Back view from here. Take the center of the cloth called obiage and bring it to the back.
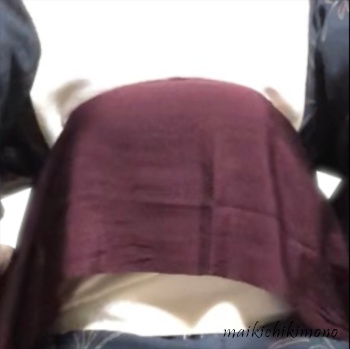
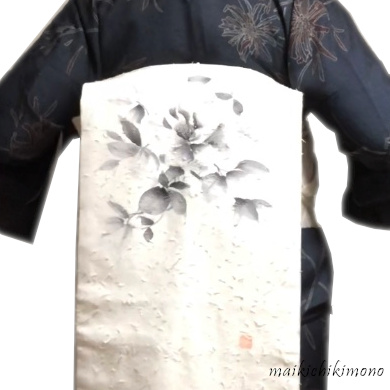
27. Cover the upper part of the pad with obiage.
28. Wrap the pad neatly pushing the extra cloth in. Tie the ends of obiage temporarily at the front.
If it is difficult for you to do this way, wrap obimakura with obiage beforehand as shown in the photo below.
Make otaiko : bottom line
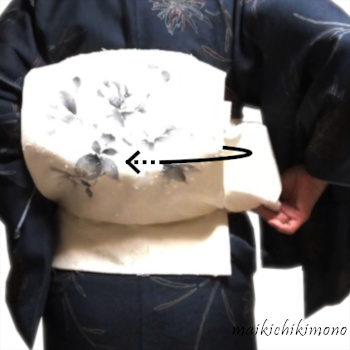
29. Untie the karihimo all.
30. Back view from here. Place karihimo along the bottom line of obi called obishitasen. Move it to tare and hold them together. Then straighten the fabric grains of obi.
31. Tuck the rest of tare inside.
32. Go on.
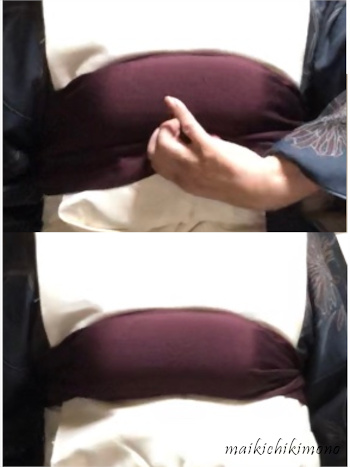
33. Leave tare or a tail about 6~8 cm. It’s your index finger length.

34. Tie karihimo firmly on obi and take te off.
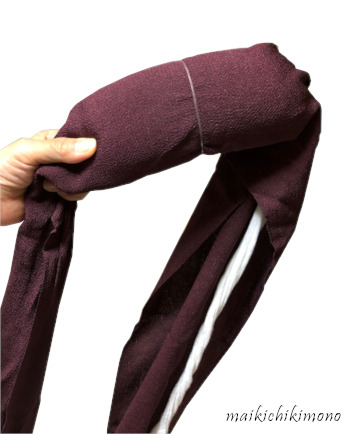
35. Back view from here. Fold te back and insert it right under the otaiko layer.
36. Adjust it to the same length as the width of otaiko. If it is long, tuck the folded part inside. Te should be along the bottom line of otaiko.
37. Make sure that otaiko lines are smooth and the pattern is in a good position.
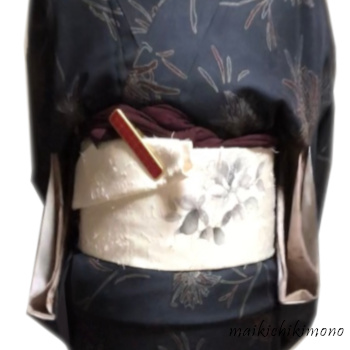
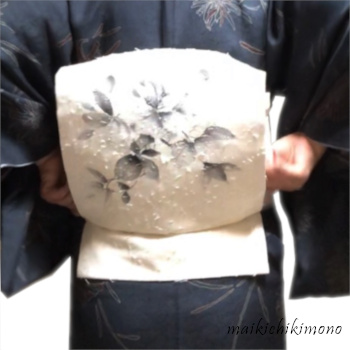
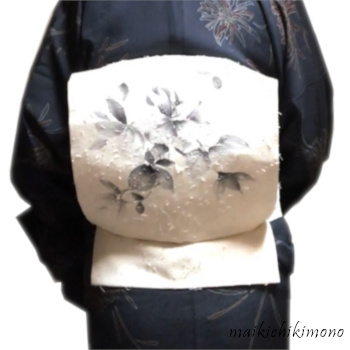
Now you have otaiko!
The next step is tying obijime and obiage.
Hang in there!