Preparation for kimono lessons
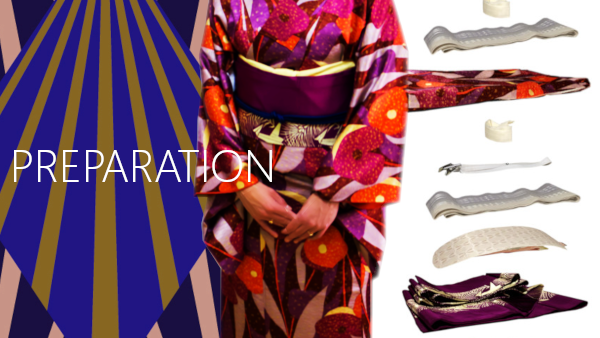
Select your favorite kimono and obi, and prepare all items.
When you begin kitsuke or putting on kimono, the first thing you have to do is preparation. It is very important because you need many kitsuke komono accessories.
Stack up kimono, obi and accessories in order, and you can put them on smoothly.
Select kimono and obi
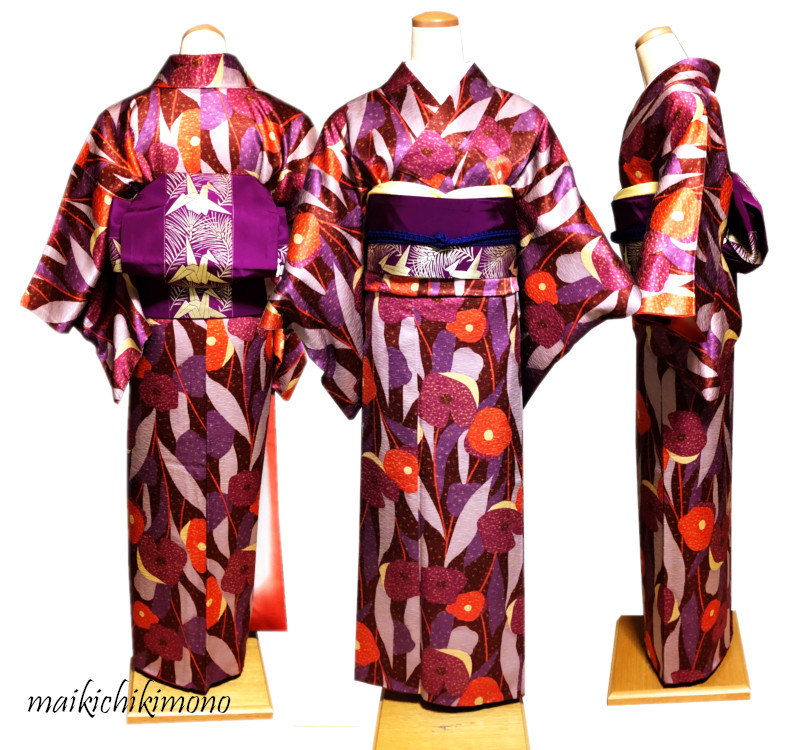
Kimono
Get your favorite one!


Please refer to What to check when you buy kimono online and Kimono structure.
At first you get your favorite nagoya obi thinking about coordination with your kimono.
There are two types, thick kyusun and thin hassun.
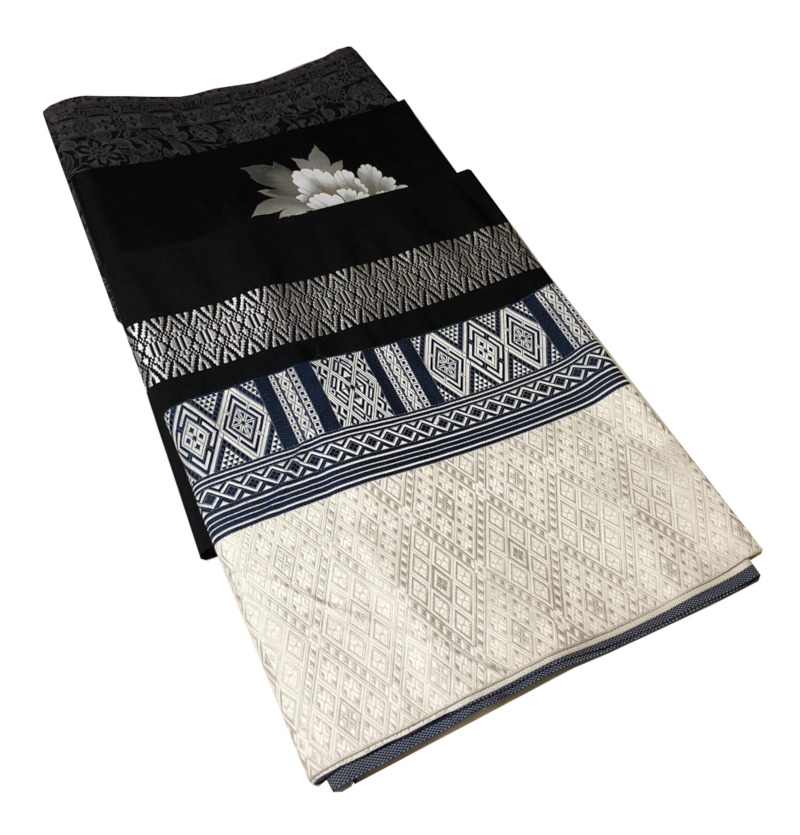
From the top kyusun with whole pattern, kyusun with otaiko pattern, hassun with kenjo pattern and hassun with koginzashi pattern
Please refer to What to check when you buy kimono online.
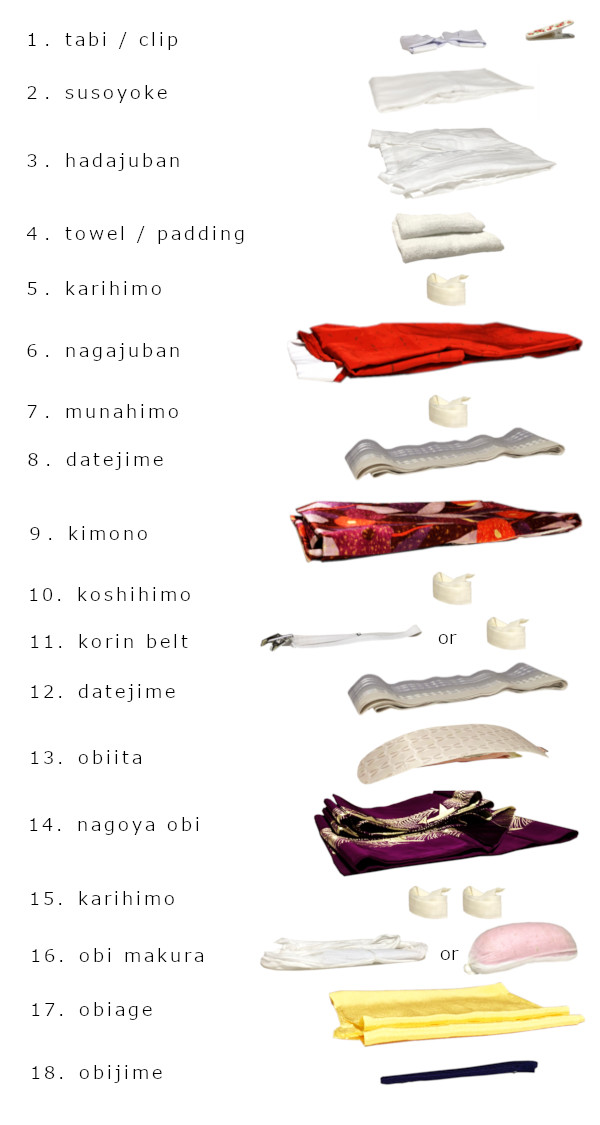
Things you prepare
They are all for wearing kimono and tying ichijudaiko. When you tie tsunodashi, you don’t have to use any obimakura pad.
- Tabi socks
- Susoyoke under skirt
- Hadajuban underwear
- Towels / padding
- 3 himo
- Haneri collar
- Erishin collar stiffener
- Nagajuban undergarment
- Kimono
- Korin belt (If you use instead of 1 himo)
- 2 datejime sash / belts
- Obiita board
- Nagoya obi
- Obimakura pad (for ichijudaiko)
- Gauze for obimakura pad (about 30 cm x your height.)
- Obiage cloth
- Obijime cord
- 1~2 clips
- Zouri
About accessories, please refer to Kimono accessories.
Sew haneri and put erishin in
Did you sew haneri on your juban and put erishin in?
If you haven’t done it, please refer to sew haneri.
Fold kimono and obi into karidatami
Before stacking up, fold the kimono and obi to make it easier to put on. It is called karidatami or temporary folding.
Kimono
It’s so easy.

1. Place the collar on the left. Fold the kimono into half and fold the sleeves under the body.
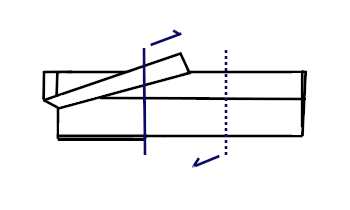
2. Fold the body into three parts equally. The solid line shows a mountain fold and the dotted line shows a valley fold.
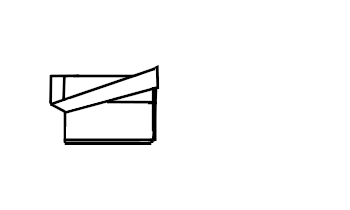
3. Finished
Nagoya obi
Obi is very long, so fold into karidatami. If not so, you might get lost in the middle of kitsuke. The obi will get tangled!
Here is the video.
Prepare obimakura, a pad for obi
When you tie ichijudaiko, wrap obimakura with the gauze.
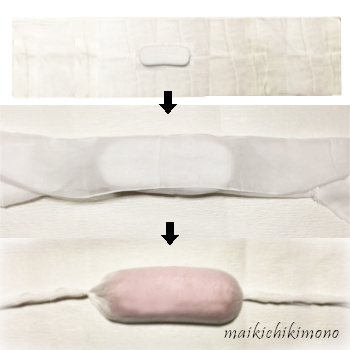
- Place obimakura with the flat side up in the center of the gauze.
- Wrap it with the gauze.
- Close the gauze on both sides of obimakura with rubber bands.
If you already selected your obiage, wrap obimakura with it as shown in the photo below.
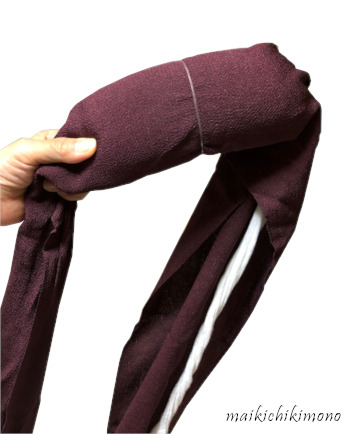
When you tie tsunodashi, put the obiage and the gauze string together with a rubber band as shown in the picture below,
Prepare himo for easy take
Himo is made of thin fabric, such as wool, cotton, silk. linen, etc. It is sewn like a tube. It is used to wear kimono instead of zippers and buttons.
Here is a video. You can learn how to fold himo. Makes it easier to take the center of himo when dressing.
Stacking up everything
The order of stacking up
Please be sure to…
- Put on tabi socks first.
- Put the erishin interlining into between haner and juban. If your juban has mikawashin interlining, erishin is no required.
- Place belts, bands, himo and cord to take their centers easily.
- Put clips aside.
- Place all items on the left side in front of you.
Put everything in a shallow box or on a wrapping cloth furoshiki.
It is better to place them on a stool, chair or low table than on the floor. You can take them more easily.
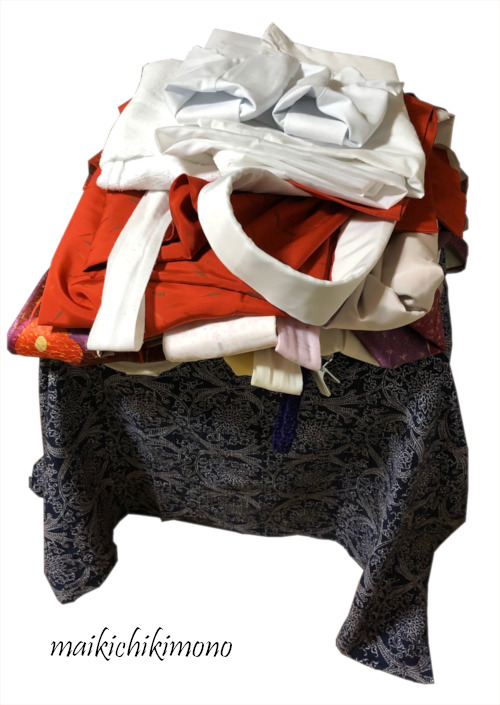 This photo is just an example.
Now everything is set for the next step.