How to put on nagajuban : one piece
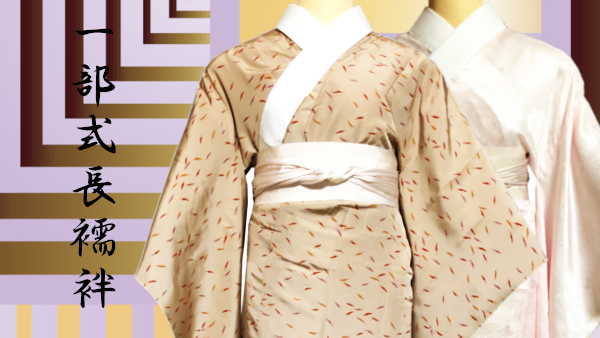
Nagajuban is an undergarment for kimono.
It has two types, an one-piece and two-piece nagajuban. The one- piece nagajuban is like a long robe. The two-piece nagajuban consists of two parts, a top and bottom.
Nagajuban has a part to show even though it is an undergarment.
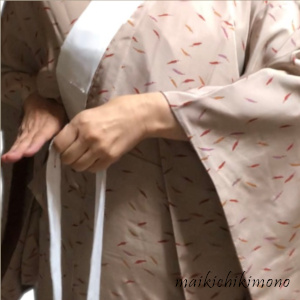
The collar is always showed. Sometimes the part of the sleeves can be seen as you move. It will be one of the attractive points of kimono. Some kimono lovers are particular about the details of nagajuban.
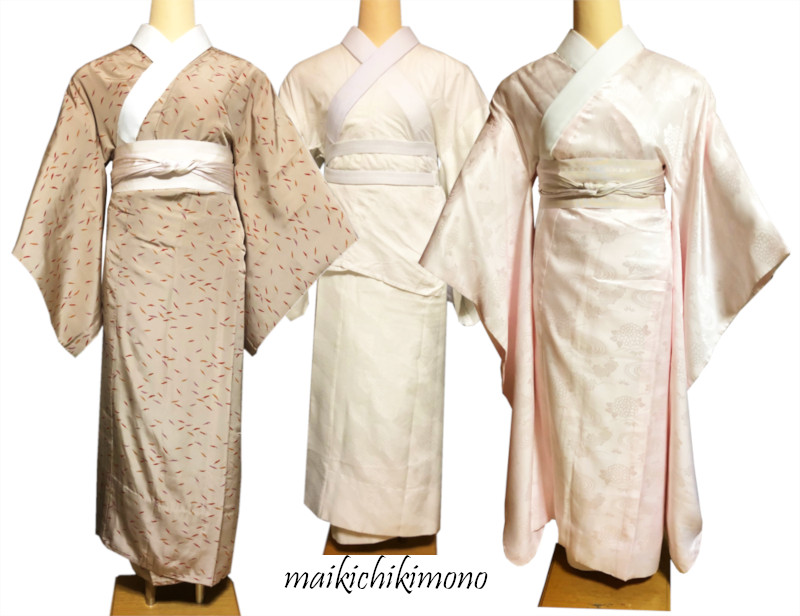
Types of juban
Please look at the photo below.
A one-piece undergarment on the left is called nagajuban. A two-piece undergarment in the middle is called nibushiki-nagajuban. A one-piece undergarment with long sleeves on the right is nagajuban for furisode.
Basically, you put on them in a same way.
Learning targets
- How to close the collar properly
- How to use munahimo effectively
If you wear nagajuban properly, you can wear kimono beautifully and comfortably. During putting on kimono, please keep your posture upright with your feet together and facing straight forward.
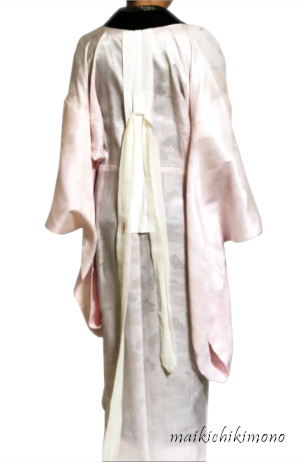
How to put on a one-piece nagajuban
Center the back seam and make emon space
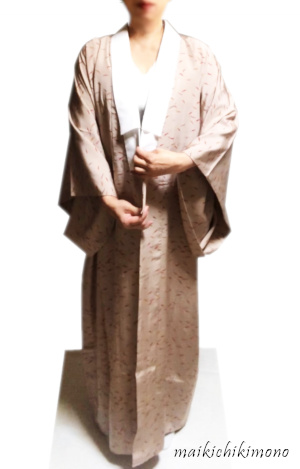
1. Put nagajuban on. Hold the collar ends equally at the center front.
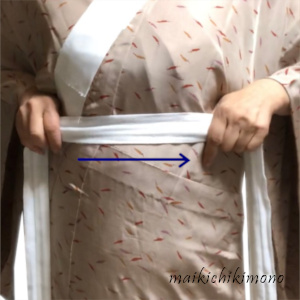
2. Holding the the back seam, move the hands back and forth to center the back seam.
3. Pull down the back seam and make emon, space at the nape.
Emon suitable for the place and use
This is emon for daily kimono. Put your fist vertically.
This is emon for formal events. Put your fist horizontally.
Close the collar
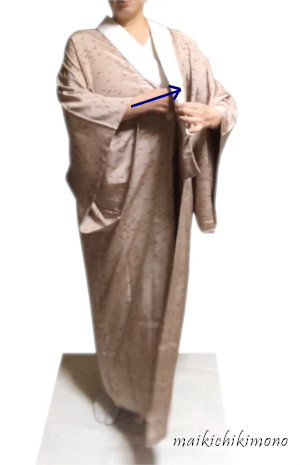
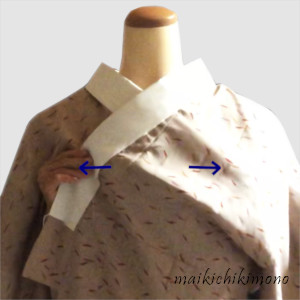
4. Holding the right collar, deeply cover your left breast with the right front part.
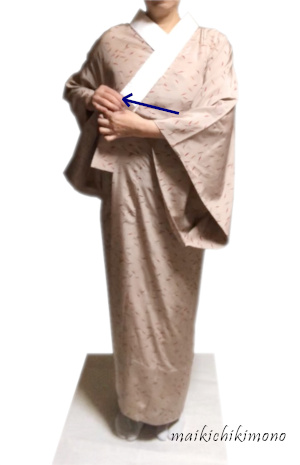
5. Holding the left collar, deeply cover your right breast with the left front part.
Put the collar in place
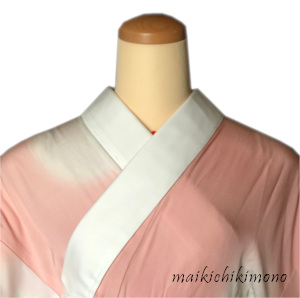
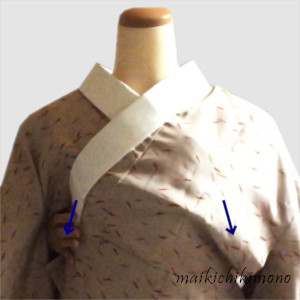
Younger women cross the collar on the notch just above the breastbone. You do the same when you wear nagajuban for furisode.

Older women cross the collar below the notch just above the breastbone.
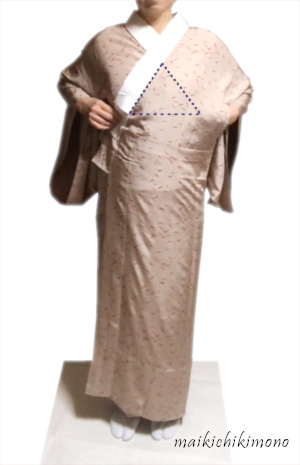
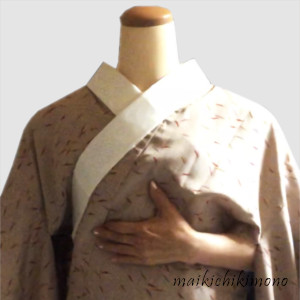
6. Do you have a symmetrical triangle on the chest? It is important to be symmetrical when wearing kimono.
Reshape the collar
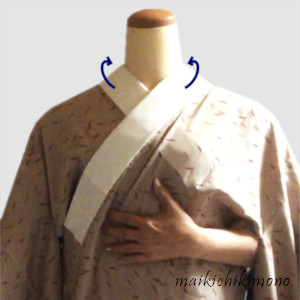
Everyone may experience standing collar and narrowing emon. In that case, please try the following.

a. Lift the collar holding with both hands at the same time.
b. When the collar opened, gently pull both sides of the collar aside.
c. Slide the hands sideways.
d. Holding the triangle (see 6) on the chest with ether hand, hold the back seam with the other hand.
e. Pull the back seam down and the collar comes along the neck. Then emon will widen.
In summer, make a little more space around the neck because it makes you cool. Next, tie munahimo.
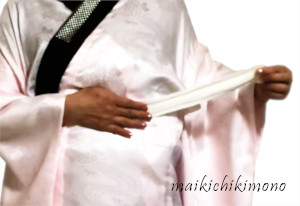
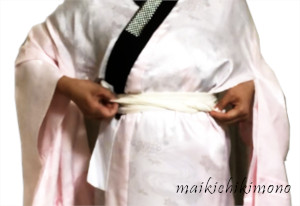
Tie munahimo
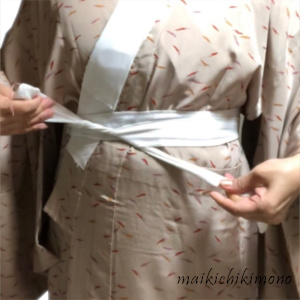
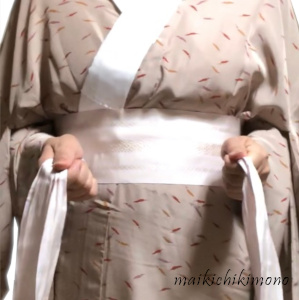
7. While holding the left collar with the right hand, take the center of munahimo with the left hand and pass it to the right hand.
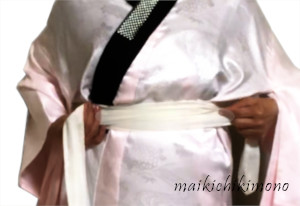
8. Slide munahimo under breasts and cross it at the back.
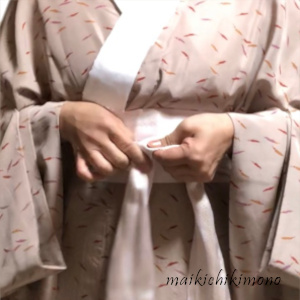
9. Bring the ends to the front and twist one end around the other end twice (make two loops).
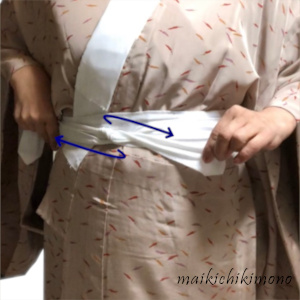
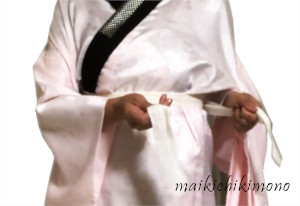
10. Cross both ends.
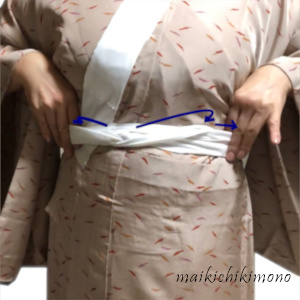
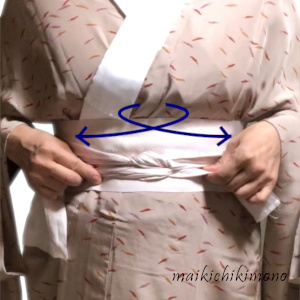
11. Tuck them in and slide your fingers to remove the wrinkles.
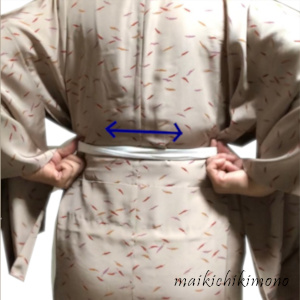
12. Slide your fingers along munahimo to remove wrinkles on the back.
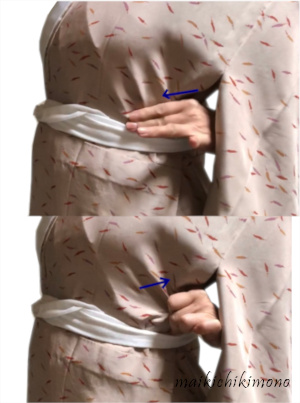
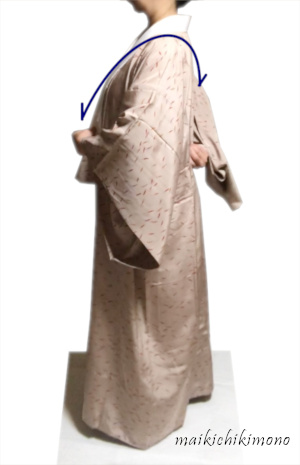
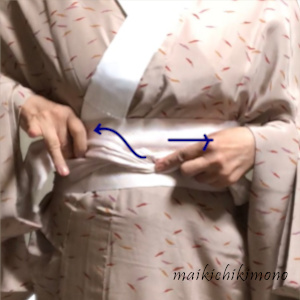
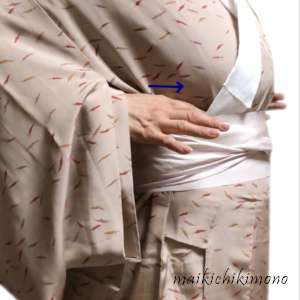
13. If you have some extra fabric at miyatsuguchi, side openings, push the back bodice inside the front one, and carefully pull the front one to remove wrinkles. Do it on both sides at the same time.
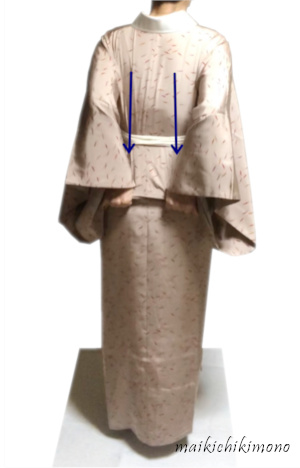
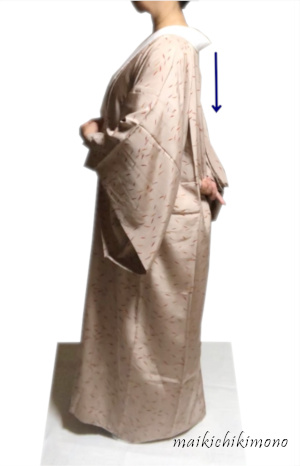
14. If your emon gets narrower, hold the waist line on the extension of the shoulder blades with both hands and pull them down at the same time.
Tie munahimo with emon-nuki
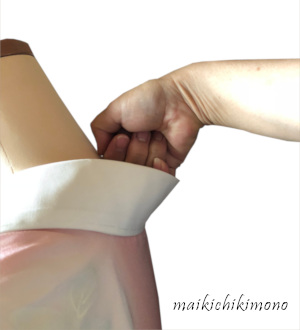
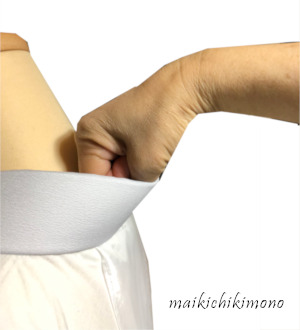
1. Pass munahimo through the hole as the photo above. If you have two holes, basically choose the upper one.
2. After centering the back seam and closing the collar, bring the right himo to the front while holding the collar.
3.While holding the collar and the right himo, bring the left himo to the front and hold the right himo with it.
4.Wrap the left himo under the breasts.
5.Twist the end twice around the other end, cross them and tuck them in. When himo is slippery, tie a half bow knot.
Wrap datejime
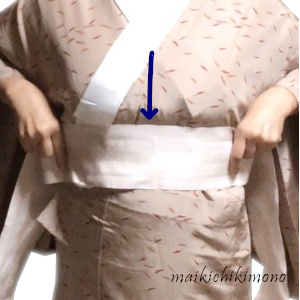
15. Place the center of datejime on the upper part of the chest and slide it under breasts. Sliding datejime prevents from the collar puffing up and also smooth wrinkles.
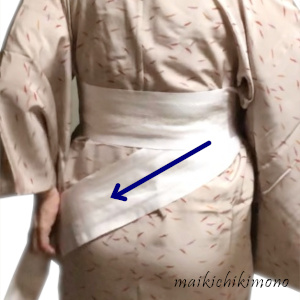
16. Cross datejime at the back with one side down.
17. Fold it up.
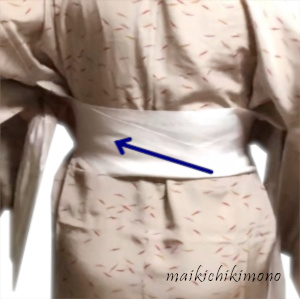
18. Bring the ends to the front and tighten datejime once.
19. Twist one end around the other end twice, while holding the cross point firmly not to get loose datejime.

20. Tighten it, but not too much.
21. Cross the ends so as to make the knot flat.
22. Tuck the ends in one by one while holding the knot with any fingers. Please be careful not to loosen the knot and the sash.

23. Put the wrinkles aside by sliding fingers.
24. Tuck the extra fabric of the back bodice into the front bodice at mitatsuguchi to remove wrinkles.
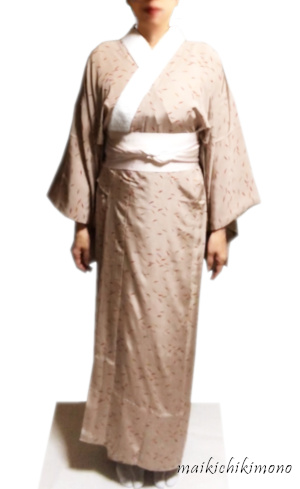
25. Okay, finished!
Nagajuban is the most important foundation. Wearing it well or badly decides your kimono style. So please take enough time to put on nagajuban .
Okay, let’s go to the next stage How to put on kimono.